- Click the cell in the current worksheet to 'hold' the Schedule
- Click on the Schedule button in the EDIT TAB
- Choose 'New' from the popup menu
- A dialog will appear
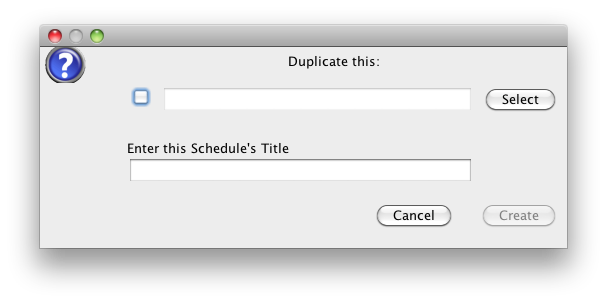
- If you have a similar schedule in another Project, you can duplicate this one into this Project
- Click the SELECT button
- Navigate to the 'Schedules' folder of the source project
- Select the other Schedule
- click the 'check box' on the left to nominate this schedule
- Click the 'Duplicate' button
The Source schedule is then copied into this Project and stored in the 'Schedules' folder.
You can now edit this Schedule by simply double clicking on the 'holding cell' - If you need to Initialize a new schedule
- 'Enter the Schedule's Name' e.g. 'StripFootingExcavation'
- Click 'Create'
A 'Default' schedule is then copied into this Project and stored in the 'Schedules' folder.
You can now edit this Schedule by simply double clicking on the 'holding cell'
- Double click on the holding cell
- Modify the Structure of this schedule to suit your requirements
- Enter some dummy data to make sure it is functioning properly
Here is the Schedule that has been created for the rest of this Tutorial Section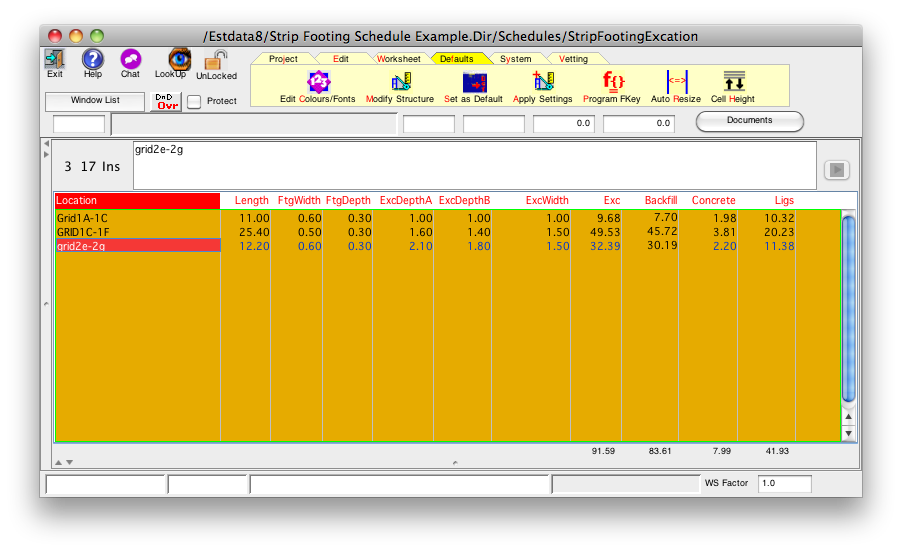
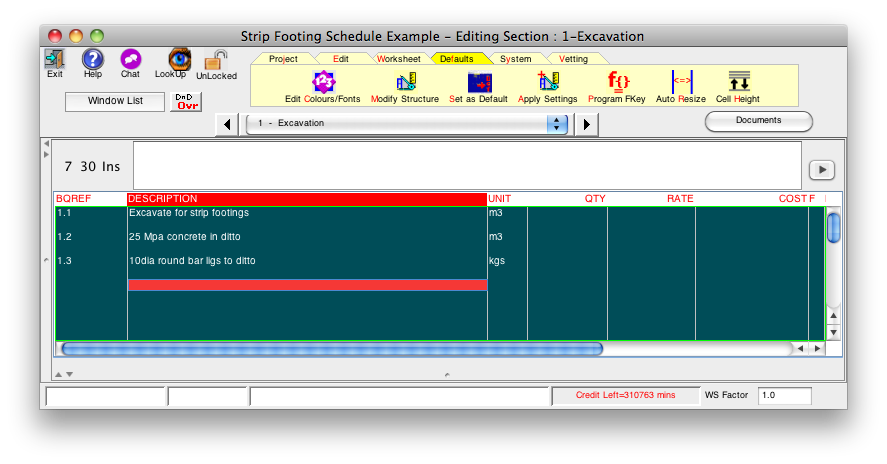
Here is the Estimate Worksheet containing the items that we will be measuring in the schedule we have just created above:
- Select the cell that you want to link a column in the Schedule with; e.g. the QTY column for item 1.1 (Excavation)
- Click the 'Schedule' option in the Edit TAB
- Select 'Link to ..' in the popup menu
- Click the 'Browse' button
A List of Schedules in the current Project will be shown - Select the Schedule for our strip footings
- Click the 'Value Column Name' combo box and select the column you want the TOTAL of for this item in this worksheet
In this case we will select 'Exc'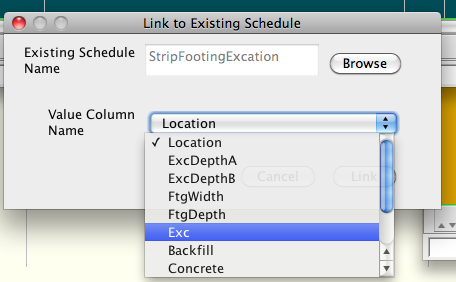
- Click the 'Link' button
- The 'link' is now stored in the cell and the Total of the column linked to shown
- Do the same for each of the other items contained in this Schedule